DIY Perodua Viva 1.0 AT Timing Mark
For the first time I've to check and change where is this compact car with single cam 3 cylinder engine timing mark i was no idea and how.
There is no such engine in the world without any of the timing mark not marking in the cam or cam pulley or any of the plate where you can see it.
Before i did trying to Google it anywhere but couldn't found what is related
So back to mechanical knowledge I've got you have to bring the piston number one to the TDC ,explanation the number one piston is the nearest to the cam or the timing belt.get your spark plug socket and remove the number one plug,for easy get some long about one foot long screw driver to the plug hole and do a revolution until it stop moving down there you know it was a piston number one at TDC.
I know there is a dot to dot mark's on the bottom pulley but...
There is no mark's on the cam pulley side of any of the cam cover or the inner side valve cover for this type of car.
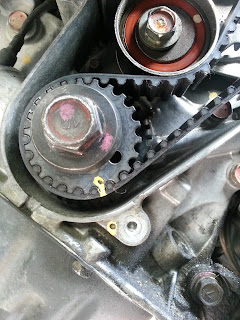
The next thing is i simply get a paint marker and mark it on the cam pulley and line up with the dot.
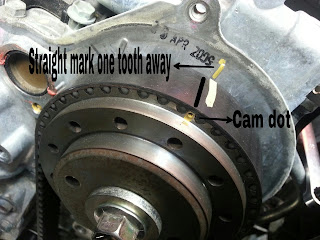
Please make sure your bottom Crank shaft pulley are already mark's line up dot to dot and your cam pulley dot are mark line up with the dot where you can see it from the pic below.
Actually there is one tooth away you should aware from the cam pulley side dot.if your are not sure i always count the belt tooth from counter clockwise to the cam pulley dot to make sure there is no mistake when you put the new belt in.Remove the tensioner bearing,check both cam oil seal,usually if there is no leak and still looking in good shape im not gonna change it,but if leaks found this is the good time to get replace.
Put the new belt on,tighten back new tensioner bearing,and make at least two counter clockwise revolution to make sure the mark's is still line up.reinstall the rest of the parts. Start your engine and you are good to go.
Good luck.
Saturday 11 July 2015
Saturday 4 July 2015
How to fix a leaking core plug
Hi there dear readers..
Hope you'll understand my very simple explaination to diy your own car.
If every time you check the water spare tank in your car was kinda empty or your radiator always need to fill up with water that is not normal, in my situation for long mileage car i have found water was dripping under hiding behind the intake manifold from the what we call it a freeze or a core cap.
So in terms to safe your budget rather to tow away your car to nearest workshop i suggest diy it and for cost is only take a few buck and a few hours depending how patient you are.
I'd like to clear any debris left in,and that wasn't not only a dirty water, lot of steel rust i just grab it with a magnetic pickup tool.
double checking and take a measurement.
Hope you'll understand my very simple explaination to diy your own car.
If every time you check the water spare tank in your car was kinda empty or your radiator always need to fill up with water that is not normal, in my situation for long mileage car i have found water was dripping under hiding behind the intake manifold from the what we call it a freeze or a core cap.
So in terms to safe your budget rather to tow away your car to nearest workshop i suggest diy it and for cost is only take a few buck and a few hours depending how patient you are.
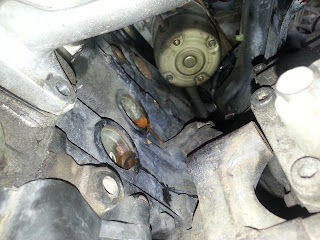
This is how the core plug behind the engine block was found leaks in 4G15 engine.
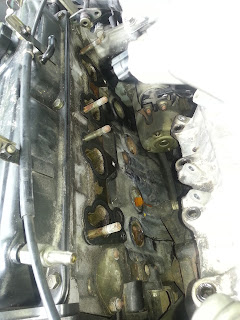
It its similar to any car ,but other car might be a bit confined place.Before that you gonna need to empty all wires, socket, fuel rail and intake manifold to make it more room coz you need a big hammer to punch in those new plug later.
Now you can clearly see where they are look like and easy to working on it.
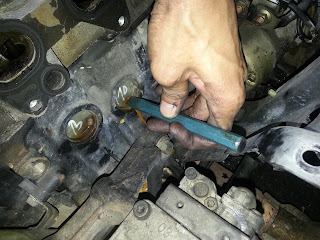
Then grab a chisel or if you don't have one a flat screw driver could be work to punch in,but be careful not punching the block wall or scratching it,it could be worse scenario you gonna get a big problem.
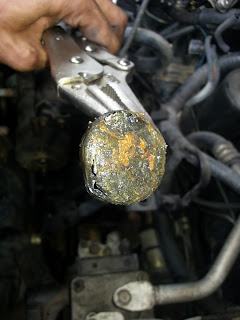
Just firmly hold the chisel a tap nicely with the hammer on the edge old core cap.than grab a long nose plier or vise grib plier and pull it out.
Well...it's pretty damn rust
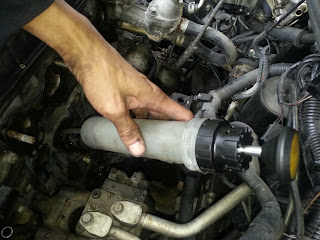
There is still a water remain inside the block that you should drain it and make sure it's all dry.i use manual fluid vacuum for easy sucking what left inside
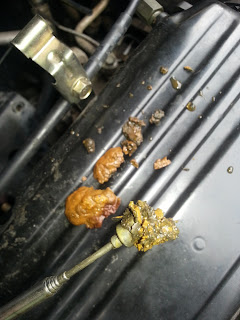
I'd like to clear any debris left in,and that wasn't not only a dirty water, lot of steel rust i just grab it with a magnetic pickup tool.
wuiyoh..how that's can it be,at lease the coolant passage is now clean a bit.
parts is ready. im using the best gasket sealant from Permatex i get it from the nearest ACE hardware .
double checking and take a measurement.
ready with the sealant.
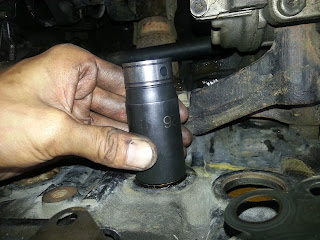
You don't need a special tool, just get a socket that fits the edge for the cap,mine was a 35mm core cap match with 26mm impact socket and get the hammer and wack it firmly and evenly. Leaving about 4mm at the end cap and make it sure is all in round shape not slanting.
The finished you'll have it.
The rest will be install back all parts together. Fill up coolant and water.check for anything left in the engine bay and start your engine,wait till temperature gauge is in normal until radiator fan is kicking and check for any leakage. Your mission accomplished. Tq
Subscribe to:
Posts (Atom)
